Integrating Home Assistant with Cloudflare Tunnel - Resolving the 400 Bad Request Error
The Problem: “400: Bad Request” Error
When attempting to set up Cloudflare Tunnel with Home Assistant, you may encounter the “400: Bad Request” error message. This error typically occurs when the Cloudflare proxy fails to establish a proper connection with the Home Assistant instance. Fortunately, this issue can be easily resolved with a few configuration adjustments.
The Solution
To resolve the “400: Bad Request” error and successfully set up Cloudflare Tunnel with Home Assistant, follow these steps:
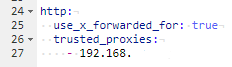
- Enable “use_x_forwarded_for” in configuration.yaml:
- Access your Home Assistant configuration files, typically located in the /config directory.
- Open the configuration.yaml file using a text editor.
- Locate the http section in the configuration file.
- Add or modify the following line under the http section:
1
use_x_forwarded_for: true
- Add the internal IP of the proxy under “trusted_proxies”:
- Again, open the configuration.yaml file in a text editor.
- Locate the http section in the configuration file.
- Add or modify the following line under the http section:
1
2
trusted_proxies:
  - <internal_IP_of_proxy>
Replace
Why these adjustments work
Enabling the “use_x_forwarded_for” setting allows Home Assistant to correctly identify the client’s IP address when accessed through a proxy. This step ensures that the Cloudflare Tunnel can establish a proper connection.
Adding the internal IP of the proxy under “trusted_proxies” tells Home Assistant to trust requests coming from that IP address. By explicitly defining the proxy as a trusted source, Home Assistant allows the Cloudflare Tunnel to forward the requests successfully.